Assembling the Log Dolly Skidding Arch
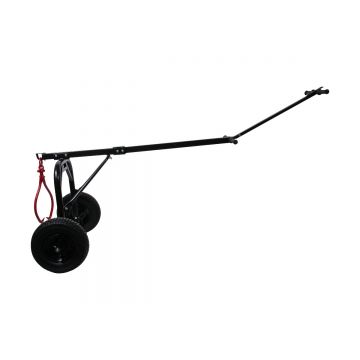
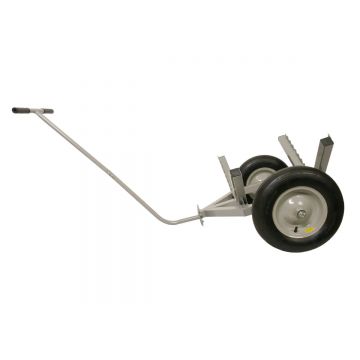
In this video, we're unboxing and assembling another member of our log dolly family, the RuggedMade Log Dolly Skidding Arch with 1,000-LB Capacity. This dolly is a great way to move a large log over all kinds of terrain. Take a look and check the link below for more information!
RELATED PRODUCTS

Video Transcript
Welcome to RuggedMade. I'm Jared and today we're going to be doing an unboxing and assembly video on our log dolly with the skidding arch. This one's rated for 1,000 pounds and the red lifting tongs are included. So, to put this together, you're just going to need some basic hand tools. There's a few nuts and bolts that require a 10mm, 17mm, and 19mm wrenches and sockets. And, the cotter pins that hold the wheels on require a pair of pliers to bend those back. Once this is assembled, it features handles, two different grab points, just if you want to move logs around your yard by hand, and there's also a way to attach it to the back of an ATV or garden tractor. So, follow along with us at home and let's get started.
All of the parts are included in the kit. You'll find the hardware in the cardboard box. Start by mounting the support bracket to the main bow frame. There are two tabs welded to the bow frame. Use two M10 x 25 bolts and locking nuts. They're welded at an angle, so that when you mount the support bracket it will stand off at approximately a 45-degree angle. The bolt and the nut both take a 17mm wrench. The support bracket should mount to the outside of the tabs.
Now, let's install the axles. Insert the axles into the round brackets welded to the bottom of the bow frame. The axles should extend outward from the bow frame. There are holes cross-drilled through the brackets and the base of the axles. Use the M6 x 50mm bolts to secure the axles. Use a 10mm wrench on the bolt heads and the nuts. Mount the main upper tube on top of the bow frame. Use two M10 x 50mm bolts to secure the tube in the bracket. Use a 17mm wrench and socket on the bolt and nut. Then use one M8 x 50mm bolt to clamp the other end of the tube onto the support bracket. Use a 12mm wrench on the head of the bolt and a 13mm socket on the nut.
Now we can install the main handle. At the end of the handle with the rubber grips, there is a tab sticking out at an angle. This tab should angle up when the main handle is inserted into the main upper tube. Insert the handle into the main upper tube. Use two M10 x 50mm bolts with locking nuts to secure the handle in the tube. Use a 17mm socket on these nuts and bolts. At the end of the extension handle with the rubber grips, there are two holes drilled vertically through the tube. Place the hitch plate over these holes and secure it with two M10 x 45 bolts and lock nuts. Mount the extension handle on the main handle by sliding the tube over the tab. Secure the extension handle with an M10 x 40mm bolt and nut.
Now we can mount the wheels. These wheels feature pneumatic tires, so make sure the valve stems are facing out. There are also Zerk grease fittings for greasing the wheel bearings. Mount the wheels on the axles and secure them with the M12 washers and M12 lock nuts. These nuts take a 19mm socket. Install the log hook cover plate on the main upper tube using an M6 x 60mm bolt and nut. Finally, take the provided log tong and hang it from the hook on the log arch. Your RuggedMade log dolly with skidding tong is now ready for use. Thanks for joining us.
SIMILAR PRODUCTS

